


Hey everyone! If you’re craving a sweet yet healthy snack, I’ve got the perfect treat for you: Frozen Yogurt Cups! These little cups are not only delicious but also packed with wholesome ingredients. With a crunchy oat base, creamy yogurt, and fresh fruit topping, they’re the ultimate guilt-free indulgence. Let me show you how to make these easy and refreshing frozen treats that are perfect for hot days or when you need a quick, nutritious snack!
Method in Detail
To start, you’ll need to mix the base. In a large mixing bowl, combine 1 cup of oats, 1/4 cup of peanut butter, and 1/4 cup of maple syrup. Stir the mixture thoroughly, making sure everything is well combined and the ingredients start to come together in a sticky, clumpy texture. This sticky mixture will form the base for your frozen yogurt cups.
Next, it’s time to prepare the muffin pan. Line a muffin pan with muffin liners. These liners are essential because they’ll make it much easier to remove the cups once they’re frozen. You can also use silicone muffin cups if you prefer. The liners will help maintain the shape of your cups and prevent any mess.
Now it’s time to shape the oat base. Take a spoon or scoop and scoop some of the oat mixture into each muffin cup. Use your fingers or the back of a spoon to press the mixture down firmly into the bottom of each cup. Pressing it down well is important, as it helps the base stay intact when frozen and creates a sturdy foundation for the yogurt layer.
Once the base is set, move on to adding the yogurt. Scoop some thick and creamy dairy-free yogurt (or any yogurt of your choice) and carefully spoon it on top of the oat base in each muffin cup. Don’t be afraid to pile it up a bit, as the yogurt will form the main layer of your frozen treat. Be generous with the yogurt to ensure each cup has a satisfying creamy top.
For the final touch, you’ll top with fruit. This is where you can get creative with your choices! Slice your favorite fruits—strawberries, bananas, blueberries, or whatever you love—and place them on top of the yogurt layer. The fruit not only adds color and flavor but also makes the cups even more refreshing and enjoyable.
The next step is to freeze the cups. Place the muffin pan in the freezer and let the cups freeze for about 3 to 4 hours, or until they become firm. This is an essential step, as the freezing process solidifies the oats and yogurt layers into a perfect frozen treat.
Finally, when you’re ready to enjoy, simply take the cups out of the freezer and let them thaw for about 5 minutes. This makes them a bit softer and easier to eat. Once they’ve softened slightly, you can enjoy the full flavor and texture of these refreshing frozen yogurt cups!
Necessary Tools
- Muffin pan
- Muffin liners
- Mixing bowl
- Spoon or scoop
- Freezer-safe container
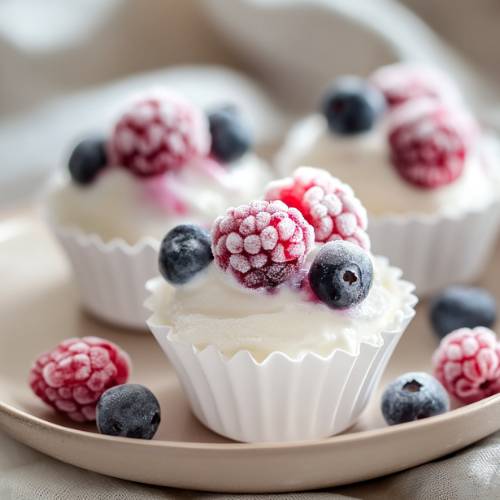
Frozen Yogurt Cups Recipe
Cuisine: AmericanDifficulty: Easy3
servings10
minutes3
hours3
hours10
minutesIngredients
1 cup oats
1/4 cup peanut butter
1/4 cup maple syrup
Dairy-free yogurt (or your preferred yogurt, choose a thick and creamy one)
Fruit of choice (strawberries, blueberries, bananas, or whatever you love!)
Directions
- Mix the base: Start by adding the oats, peanut butter, and maple syrup to a bowl. Stir everything together well until it forms a sticky mixture.
- Prepare the muffin pan: Line a muffin pan with muffin liners. These will help you easily remove the cups later!
- Shape the oat base: Scoop the oat mixture and place it into each muffin cup. Press it down with your fingers to form a solid base.
- Add the yogurt: Now, scoop some thick and creamy dairy-free yogurt on top of the oat base. Don’t be afraid to pile it up a bit!
- Top with fruit: Add your fruit on top of the yogurt. Feel free to get creative with the fruit – strawberries, blueberries, or sliced bananas all work wonderfully.
- Freeze: Pop the muffin pan into the freezer and let it freeze for about 3-4 hours, or until firm.
- Enjoy: When you’re ready to enjoy your frozen yogurt cups, let them sit out for about 5 minutes to soften just a little bit. Then, dig in and savor the goodness!
Notes
- Freezing time: Make sure to freeze the cups for at least 3 hours. If you don’t freeze them long enough, they’ll be too soft and may fall apart when you try to eat them.
- Choose the right yogurt: It’s important to use a thick and creamy yogurt for the best results. Thin yogurt won’t hold up well and can make the cups a bit runny.
- Fruit choice: Fresh fruit works best, but if you’re using frozen fruit, be sure to thaw it first and dry it off to avoid excess moisture in your yogurt cups.


Serving Suggestions
These frozen yogurt cups are perfect as an afternoon snack or even a light dessert. They’re also great for a healthy breakfast on the go! Pair them with a glass of water or a smoothie to create a balanced snack. You can serve them at a family gathering, party, or even at a summer BBQ – they’re sure to be a hit!
Fun Fact
Did you know that oats are not just tasty but also super healthy? They’re packed with fiber and can help keep you full longer. This recipe combines the health benefits of oats with the goodness of yogurt, making it a perfect treat for anyone looking to stay energized!
Conclusion
Frozen Yogurt Cups are the perfect snack when you’re craving something sweet and healthy. With simple ingredients, a few steps, and a little time in the freezer, you can have a refreshing treat that’s full of flavor and nutrients. Plus, they’re super customizable with your favorite fruits! Give this recipe a try and let me know how it turns out! Enjoy!