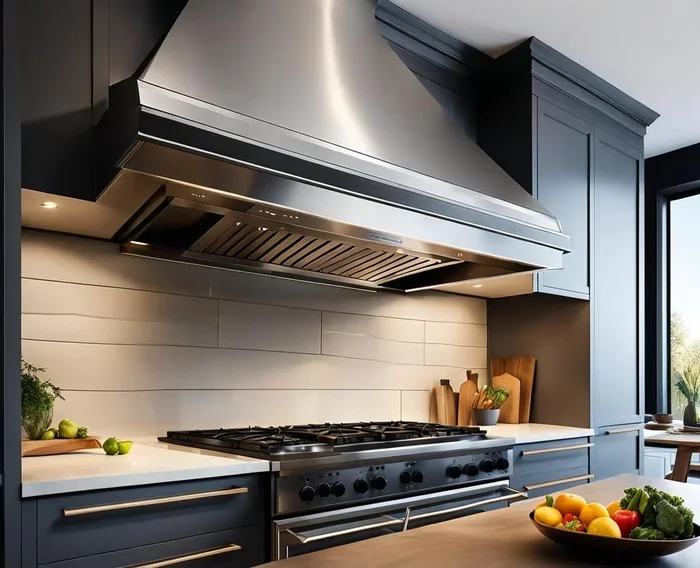

Installing a kitchen vent is one of the smartest upgrades you can make for a cleaner, fresher home. This guide walks you through every step of how to install a kitchen vent from choosing the right type to finishing the job like a pro. You will learn about ducted and ductless options, gather the right tools, and follow a clear installation process. By the end, you will feel confident tackling this project yourself and enjoy better air quality in your kitchen every single day.
A dirty, smelly kitchen is no fun. Cooking fills the room with grease, smoke, and odors that linger for hours. A kitchen vent solves all of that. It pulls dirty air out and keeps your space fresh. But many homeowners hesitate because they think how to install a kitchen vent is too hard.
Here is the truth. Installing a kitchen vent is a very doable weekend project. You do not need to be a professional. You just need the right guide, the right tools, and a little confidence. This article gives you everything you need. We will cover the types of vents available, the tools you need, a step-by-step installation process, and tips to avoid common mistakes. By the time you finish reading, you will be ready to upgrade your home with a brand new ventilation system.
Let us get started. Your kitchen deserves better air, and so do you.
Key Takeaways
- Choose the right vent type: Ducted vents remove grease and odors more effectively than ductless models.
- Match CFM to your kitchen size: A higher CFM rating means stronger airflow and better ventilation.
- Proper ductwork is essential: Keep duct runs short and avoid bends to maximize airflow efficiency.
- Follow safety first: Always turn off power and check local building codes before starting.
- Regular maintenance keeps performance high: Clean filters and ducts every few months for best results.
- DIY installation saves money: With the right tools and guidance, most homeowners can complete the job in a weekend.
📑 Table of Contents
- Why a Kitchen Vent Matters for Your Home
- Types of Kitchen Vents to Consider
- Tools and Materials You Will Need
- Step-by-Step Guide: How to Install a Kitchen Vent
- Common Mistakes to Avoid During Installation
- Maintenance Tips to Keep Your Vent Running Strong
- How a New Kitchen Vent Upgrades Your Entire Home
- Final Thoughts on Installing Your Kitchen Vent
Why a Kitchen Vent Matters for Your Home
Many people underestimate the power of a good kitchen ventilation system. They think it is just a nice-to-have. But the truth is, a vent does much more than remove smoke. It protects your health, your walls, and your overall home comfort.
Health Benefits of Proper Kitchen Ventilation
When you cook, especially with oil or high heat, your kitchen fills with tiny particles. These float in the air and settle on every surface. Over time, they can cause breathing problems. A range hood installation captures these particles before they spread. This is especially important for people with asthma or allergies.
Beyond that, cooking releases carbon monoxide and other gases. Without proper air flow, these can build up to unsafe levels. A vent pushes them outside where they belong. Your family breathes easier, and your kitchen stays safer.
Protecting Your Kitchen Surfaces
Grease settles on cabinets, walls, and ceilings. Over months and years, this buildup becomes hard to clean. A ventilation system catches most of that grease before it spreads. Your kitchen stays cleaner longer, and you spend less time scrubbing.
Here is a quick look at what a vent protects:
- Cabinets and wood surfaces — grease stains and discoloration
- Wall paint and wallpaper — sticky residue and yellowing
- Ceiling and light fixtures — grease buildup that is hard to reach
- Appliances — grease coating that affects performance over time
Odor Control and Comfort
Let us be honest. Nobody wants their living room to smell like last night’s fried fish. A kitchen exhaust fan removes cooking odors quickly. It keeps your whole home smelling fresh. This is especially valuable in open floor plans where the kitchen connects directly to living spaces.
Types of Kitchen Vents to Consider
Not all kitchen vents are the same. Before you start how to install a kitchen vent, you need to pick the right type. The two main categories are ducted and ductless. Each has its own strengths and weaknesses.
Ducted Vents (Also Called Vented Hoods)
A ducted vent sends air through a duct or pipe to the outside. This is the most effective option. It removes grease, smoke, steam, and odors completely. The air does not recirculate back into your kitchen.
Ducted vents work best when you can route the duct through an exterior wall or the roof. They are the gold standard for kitchen ventilation. If you are doing a kitchen remodel, this is the type to choose whenever possible.
Ductless Vents (Also Called Recirculating Hoods)
A ductless vent filters the air and pushes it back into the kitchen. It uses charcoal or grease filters to clean the air. These vents are easier to install because they do not require ductwork or an exterior opening.
However, ductless vents are less effective. They do not remove all grease or odors. They work best for light cooking and in situations where running a duct is not possible.
Comparison Table: Ducted vs. Ductless
| Feature | Ducted Vent | Ductless Vent |
|---|---|---|
| Airflow Efficiency | High — pushes air outside | Medium — recirculates air |
| Grease Removal | Excellent | Good, but not complete |
| Odor Removal | Excellent | Fair to moderate |
| Installation Complexity | Moderate to high | Low to moderate |
| Cost | Higher (ductwork needed) | Lower |
| Best For | Heavy cooking, large kitchens | Apartments, rentals, light cooking |
Mounting Styles: Wall-Mount, Under-Cabinet, and Island
Beyond ducted and ductless, you also need to choose a mounting style. The style depends on your kitchen layout and where your stove or cooktop sits.
Wall-mount vents attach directly to the wall above the stove. They are the most common type and work well with standard layouts. Under-cabinet vents mount beneath a cabinet and save space. They are great for smaller kitchens. Island vents hang from the ceiling and are perfect for kitchens with a center island. Each style has its own installation requirements, so plan accordingly.
Tools and Materials You Will Need
Before you start how to install a kitchen vent, gather everything you need. Having the right tools makes the job faster, safer, and much more enjoyable.
Essential Tools
- Power drill with various drill bits
- Screwdriver set (Phillips and flathead)
- Tape measure for accurate measurements
- Level to ensure the vent is straight
- Hacksaw or jigsaw for cutting duct holes
- Stud finder to locate wall studs
- Wire stripper and connectors for electrical work
- Ladder for reaching high mounting points
- Utility knife for trimming trim pieces
Materials Checklist
- Kitchen vent hood (sized for your cooktop)
- Duct pipe (typically 6-inch or 8-inch diameter)
- Duct connectors and clamps
- Grease filters (usually included with the hood)
- Charcoal filters (only for ductless models)
- Drywall or cut-out template
- Screws and wall anchors
- Electrical wire and wire nuts
- Sealant or metal tape for airtight connections
- Vent cap or roof jack (for exterior termination)
Choosing the Right CFM Rating
CFM stands for cubic feet per minute. It measures how much air your vent moves. A higher CFM means stronger air flow. As a rule of thumb, you want at least 100 CFM for every linear foot of your cooktop. For example, a 30-inch cooktop needs a vent rated at least 200 CFM. For gas stoves or frequent frying, go higher — around 400 to 600 CFM.
Step-by-Step Guide: How to Install a Kitchen Vent
Now for the part you have been waiting for. Here is the full how to install a kitchen vent process, broken down into clear steps. Follow these in order for the best results.
Step 1: Plan Your Layout
Start by deciding where the vent will go. The ideal position is directly above or as close as possible to the cooktop. Measure the distance from the cooktop to the vent. Most manufacturers recommend 24 to 30 inches between the cooktop and the bottom of the hood.
Next, plan your duct route. The shortest, straightest path is always best. Every bend in the duct reduces air flow and efficiency. If you can go straight up through the ceiling or straight out through the wall, that is ideal.
Step 2: Turn Off the Power
Safety comes first. Before you touch any wires or cut into walls, turn off the power to the area. Find your circuit breaker and switch off the kitchen circuit. Use a voltage tester to confirm the power is off. Never skip this step.
Step 3: Cut the Hole for the Duct
Mark the cut-out location on the wall or ceiling. Use your stud finder to avoid hitting structural members or pipes. Cut the hole using a jigsaw or hole saw. Make sure the hole matches the size of your duct pipe.
If you are going through the roof, you will also need to cut a corresponding hole from the outside. Use a roof jack or flashing to create a weatherproof seal at the exterior exit point.
Step 4: Mount the Vent Hood
Hold the vent in position and mark the screw holes. Use a level to make sure it is straight. Drill pilot holes and secure the mounting bracket. Most wall-mount and under-cabinet vents use screws that go directly into wall studs. If studs are not in the right place, use heavy-duty wall anchors.
Once the bracket is secure, hang or slide the vent hood onto the bracket. Give it a gentle tug to make sure it is firmly attached.
Step 5: Connect the Ductwork
Attach the duct pipe to the vent hood’s exhaust outlet. Use a metal connector and secure it with clamps. Wrap the joint with metal tape or sealant to prevent air leaks. Avoid using duct tape — it does not hold up well against heat and grease.
Run the duct to the exterior opening. Keep the run as straight as possible. If you need bends, use long-radius elbows instead of sharp turns. Each bend reduces air flow by up to 20 percent.
Step 6: Wire the Vent
Most kitchen vents require a dedicated electrical circuit. Check the manufacturer’s instructions for voltage requirements. Some vents plug into a standard outlet, while others need hardwired connections.
Connect the wires following the wiring diagram in the manual. Typically, you will connect black to black, white to white, and green or bare to the ground wire. Use wire nuts to secure each connection. Tuck the wires neatly into the electrical box before mounting the hood.
Step 7: Install Filters and Test the System
Insert the grease filter into the hood. Most filters slide in from the front and are dishwasher safe. If you have a ductless model, also add the charcoal filter on top of the grease filter.
Turn the power back on at the breaker. Switch on the vent and test all speeds. Listen for unusual noises and check that air is moving strongly through the duct. If you feel air leaking at any joint, add more sealant or tighten the clamps.
Quick Tips for a Smooth Installation
- Use rigid or semi-rigid duct instead of flexible hose whenever possible. Rigid duct moves more air and collects less grease.
- Keep the duct run under 10 feet for maximum efficiency.
- Add a backdraft damper at the exterior exit to prevent outside air from flowing back in.
- Check local building codes before you start. Some areas require permits for range hood installation.
- Have a helper hold the vent in place while you mark and drill. It is much easier with two people.
Common Mistakes to Avoid During Installation
Even with the best guide, mistakes happen. Here are the most common errors people make when installing a kitchen vent, and how to avoid them.
Using the Wrong Size Duct
A common mistake is using a duct that is too small. This restricts air flow and reduces the vent’s performance. Always match the duct size to the hood’s exhaust opening. Most standard vents use 6-inch or 8-inch diameter duct. Check your manual for the exact size.
Ignoring Building Codes
Every area has its own building code requirements for ventilation. Some require a specific CFM rating for the room size. Others require a make-up air system to replace the air being pulled outside. Failing to follow codes can result in fines or failed inspections. Call your local building department before you start.
Creating Too Many Bends in the Duct
Each bend in the duct reduces airflow. Two 90-degree bends can cut efficiency in half. If you must change direction, use a single long-radius elbow instead of two sharp turns. The straighter the path, the better the exhaust fan performs.
Forgetting to Seal Joints Properly
Air leaks at duct joints waste energy and reduce performance. Use metal tape or mastic sealant on every connection. Do not use regular cloth duct tape. It peels off quickly and does not seal well.
Skipping the Grease Filter Cleaning
Some homeowners install the vent and forget about it. Grease builds up in the filter and blocks airflow. Clean your grease filter every two to four weeks if you cook frequently. Most filters are dishwasher safe, so cleaning is quick and easy.
Maintenance Tips to Keep Your Vent Running Strong
Installation is only half the battle. A kitchen ventilation system needs regular maintenance to keep performing well. The good news is maintenance is simple and quick.
Cleaning the Grease Filter
Remove the grease filter and soak it in hot, soapy water for 15 to 20 minutes. Scrub away any remaining grease with a soft brush. Rinse it thoroughly and let it dry before reinstalling. For tough buildup, you can boil the filter in water with a splash of dish soap.
Checking the Duct for Blockages
Once or twice a year, check the duct for blockages. Birds, nests, and debris can get trapped at the exterior vent opening. Use a flashlight to look inside the duct. If you see any obstructions, remove them carefully.
Replacing Charcoal Filters
If you have a ductless vent, the charcoal filter needs to be replaced every 6 to 12 months. You cannot clean charcoal filters. They lose their effectiveness over time and must be swapped out. Replacement filters are inexpensive and easy to find.
Inspecting the Blower Motor
Listen to your vent while it runs. Unusual grinding or rattling sounds can signal a problem with the blower motor. Lubricate the motor bearings if your model allows it. If the noise continues, you may need to replace the motor. Most motors are easy to access and swap out.
Expert Insight: When to Call a Professional
Most how to install a kitchen vent tasks are well within a DIYer’s ability. However, there are times when you should call a professional. If your duct run requires complex roof penetrations, if you are not comfortable with electrical wiring, or if your local codes require a licensed installer, do not hesitate to hire one. A professional ventilation system install ensures safety and code compliance. It is worth the investment for peace of mind.
How a New Kitchen Vent Upgrades Your Entire Home
Installing a kitchen vent does more than improve your kitchen. It upgrades your entire home. Fresh air flows better, odors disappear faster, and your living spaces stay cleaner. Homebuyers notice a quality range hood installation when they tour a kitchen. It adds real value to your property.
A good vent also makes cooking more enjoyable. You can sear a steak, stir-fry vegetables, or bake bread without worrying about smoke filling the room. The kitchen becomes a place you want to spend time in, not avoid.
If you are planning a kitchen remodel, a new vent should be at the top of your list. It is one of those upgrades that you use every single day and truly notice when it is gone.
Final Thoughts on Installing Your Kitchen Vent
How to install a kitchen vent does not have to be intimidating. With the right planning, the right tools, and this guide, you can do it yourself and enjoy the results immediately. A well-installed kitchen ventilation system transforms your cooking experience. It keeps your air clean, your surfaces grease-free, and your home smelling fresh.
Start by choosing the right vent type for your kitchen. Plan your duct route carefully. Follow each step of the installation process, and do not skip safety precautions. Maintain your vent regularly, and it will serve you well for many years to come.
Take the leap today. Your kitchen — and your whole home — will thank you.
Frequently Asked Questions
Do I need a permit to install a kitchen vent?
It depends on your local building code. Many areas require a permit for any new exhaust fan or ductwork installation. Check with your local building department before starting the project to avoid fines or issues during a home sale.
Can I install a kitchen vent myself or should I hire a pro?
Most homeowners can handle a DIY how to install a kitchen vent project if they are comfortable with basic tools and electrical work. However, if your installation involves complex ductwork through the roof or unfamiliar wiring, hiring a professional is a smart choice for safety and code compliance.
What CFM rating do I need for my kitchen vent?
A general rule is 100 CFM for every linear foot of your cooktop. A 30-inch cooktop needs at least 200 CFM. For heavy cooking or gas stoves, aim for 400 to 600 CFM to ensure strong air flow and effective grease filter performance.
How often should I clean my kitchen vent filters?
Clean your grease filter every two to four weeks if you cook frequently. A simple soak in hot, soapy water does the job. Charcoal filters in ductless models need replacement every 6 to 12 months since they cannot be cleaned.
Is a ducted or ductless kitchen vent better?
A ducted vent is almost always better for performance. It removes grease, smoke, and odors completely by pushing them outside. A ductless vent recirculates filtered air and works well for light cooking or spaces where running a duct is not possible.
How long does it take to install a kitchen vent?
Most DIY installations take about 3 to 5 hours from start to finish. The time depends on the vent type, duct route complexity, and your experience level. Having all tools and materials ready before you start keeps the process smooth and efficient.
=== CONCLUSION ===
Installing a kitchen vent is one of the most rewarding home upgrades you can tackle. It improves air quality, protects your kitchen surfaces, and makes every meal more enjoyable. This guide covered everything from choosing the right vent type to completing the range hood installation step by step. You now know how to plan the layout, gather your tools, connect the ductwork, wire the unit safely, and avoid the most common mistakes.
Remember that a ventilation system works best when you maintain it regularly. Clean your filters, check your ducts, and listen for any unusual sounds. With proper care, your new vent will keep your kitchen fresh and clean for years to come. Take what you learned here, gather your tools, and start your project today. Your kitchen — and your home — deserve the upgrade.