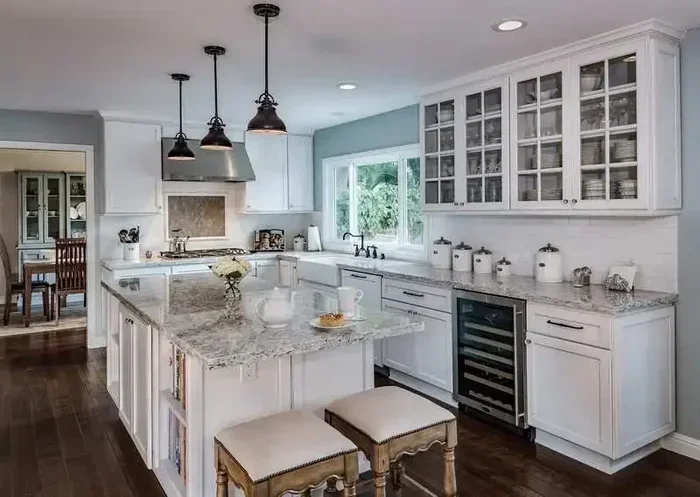

You can transform your kitchen by learning how to paint kitchen cabinets white without sanding. This method saves time, reduces mess, and delivers stunning results when you use the right products. We walk you through every step, from deglossing to the final topcoat, so your cabinets look professionally done.
You love your kitchen, but those cabinets? They’re holding the whole room back. Maybe they’re outdated wood, maybe they’re stained, or maybe they’re just begging for a fresh start. The good news is you don’t need to spend thousands on a kitchen remodel.
Learning how to paint kitchen cabinets white without sanding is a game-changer. It saves you hours of backbreaking work and still delivers jaw-dropping results. Whether you’re a first-time DIYer or a seasoned home improver, this method works wonders.
In this guide, we’ll walk you through every single step. You’ll learn what products to use, how to prep your cabinets, and the painting techniques that make the difference between a DIY job and a professional finish. Let’s turn those tired cabinets into something beautiful.
Key Takeaways
- No sanding is needed: Modern bondable primers and liquid deglossers let you skip the tedious sanding step entirely.
- Proper prep is everything: Cleaning and deglossing your cabinets ensures the paint adheres perfectly.
- Choose the right primer: A bondable or adhesion-promoting primer is the secret to a durable, chip-resistant finish.
- Use quality paint: Cabinet-grade enamel paints give you a smooth, hard-wearing surface that withstands daily kitchen use.
- Apply thin coats: Multiple thin coats beat one thick coat every time for a professional look.
- Reassemble carefully: Labeling and organizing hardware during disassembly makes reassembly a breeze.
📑 Table of Contents
- Why Skip Sanding When Painting Cabinets?
- What You’ll Need for This Project
- Step-by-Step Guide to Painting Cabinets Without Sanding
- Common Mistakes to Avoid
- Quick Tips for a Professional Finish
- How Long Does the Project Take?
- Comparing Methods: Sanding vs. No-Sand Cabinet Painting
- Expert Insights on Cabinet Painting Without Sanding
- Cost Breakdown: How Much Does It Really Cost?
- How to Maintain Your Newly Painted Cabinets
- Frequently Asked Questions
- Final Thoughts
Why Skip Sanding When Painting Cabinets?
Sanding kitchen cabinets is nobody’s idea of a good time. It’s messy, loud, and incredibly tedious. Every groove, every corner, every raised detail needs attention. Many homeowners put off cabinet painting projects simply because they dread the sanding phase.
Here’s the truth: you don’t have to sand anymore. Modern paint products and specialty primers have changed the game completely. A bondable primer or liquid deglosser creates the perfect surface for paint to grip onto. The result? A smooth, durable finish without a single sheet of sandpaper.
This approach also protects your cabinets from damage. Sanding can remove too much material or create uneven surfaces. Skipping it keeps your original finish intact while still allowing new paint to bond strongly. It’s a win-win for your cabinets and your weekend plans.
How Bondable Primers Work
Bondable primers are specially formulated to adhere to slick, glossy, or previously finished surfaces. They create a microscopic grip layer that regular primer can’t match. Think of it like double-sided tape — it grabs onto the old finish and gives your new paint something to hold onto.
These primers work on wood, laminate, melamine, and even metal cabinets. As long as the surface is clean and free of grease, you’re good to go. That’s why they’re the go-to choice for cabinet painting without sanding.
What You’ll Need for This Project
Before you start, gather everything you need. Having all your supplies ready keeps the project moving smoothly and prevents frustrating pauses mid-job.
Essential Supplies
- Liquid deglosser or TSP substitute — for cleaning and preparing the surface
- Bondable primer — look for products labeled “adheres to any surface”
- Cabinet-grade enamel paint — water-based or oil-based, your choice
- Mini foam roller — for smooth, streak-free application on flat surfaces
- Angled synthetic brush — for edges, corners, and detailed areas
- Paint tray and liner — keeps your workspace clean
- Tack cloth or lint-free rag — for wiping away dust and residue
- Painter’s tape — protects hinges, handles, and adjacent surfaces
- Drop cloth or plastic sheeting — protects your countertops and floor
- Screwdriver set — for removing cabinet doors and hardware
- Small containers or bags — for organizing screws and hardware
Recommended Paint Brands for Cabinet Projects
Not all paints are created equal. Cabinet painting requires a durable finish that can handle daily use, moisture, and frequent cleaning. Here are some trusted options:
- Benjamin Moore Advance — a waterborne enamel that self-levels beautifully
- Sherwin-Williams Pro Classic — a popular choice for cabinet refinishing
- General Finishes Cabinet Paint — designed specifically for cabinets
- Fusion Mineral Paint — great adhesion without sanding required
- Rust-Oleum Cabinet Paint — a budget-friendly spray or brush option
Step-by-Step Guide to Painting Cabinets Without Sanding
Now for the fun part. Follow these steps carefully, and you’ll have gorgeous white cabinets in just a few days. Each step builds on the last, so don’t skip anything.
Step 1: Remove All Cabinet Hardware and Doors
Start by taking off every door, drawer front, and hinge. Use your screwdriver and place each screw in a labeled bag or container. It helps to number your cabinets with painter’s tape so you know exactly where everything goes back.
Remove all handles, knobs, and pulls too. If you plan to keep your existing hardware, clean it now. If you want a fresh look, consider swapping in new cabinet hardware — it makes a huge difference in the final appearance.
Lay out a workspace with your drop cloth. A clean, organized setup now saves you headaches later when it’s time to reassemble.
Step 2: Deep Clean Every Surface
Kitchen cabinets collect grease, grime, and cooking residue over the years. If you paint over dirty surfaces, the paint won’t stick properly. This step is non-negotiable.
Mix a solution of warm water and TSP substitute, or use a dedicated deglosser cleaner. Wipe down every surface — inside and out — with a lint-free rag. Pay extra attention to the areas around handles and hinges where grease builds up the most.
Let the cabinets dry completely before moving to the next step. Any moisture trapped under paint will cause peeling and bubbling later.
Step 3: Apply Liquid Deglosser
This is the step that replaces sanding. Pour some liquid deglosser onto a clean rag or sponge and wipe down every surface you plan to paint. The deglosser dulls the existing finish chemically, creating tiny microscopic scratches that help primer and paint bond.
Work in sections and don’t let the deglosser dry on the surface. Follow the product instructions carefully — some need to sit for a few minutes before you wipe them off, while others work instantly.
After applying, wipe the surface with a fresh, damp rag to remove any residue. Then use a tack cloth to pick up any remaining dust or fibers. Your cabinets should feel slightly matte and ready for primer.
Step 4: Apply Bondable Primer
Primer is the most important step in painting cabinets without sanding. It bridges the gap between the old finish and your new paint, ensuring long-lasting adhesion.
Use a mini foam roller for flat cabinet surfaces. Roll in thin, even strokes — don’t overload the roller with paint. For edges, corners, and detailed areas, switch to an angled synthetic brush.
Apply one thin coat and let it dry completely. Check the product label for drying times, but most bondable primers need 1-2 hours between coats. Most cabinet projects need two coats of primer for the best results.
After the second coat, lightly wipe the surface with a tack cloth again. This removes any tiny dust particles that settled during drying and ensures your paint goes on smoothly.
Step 5: Paint Your Cabinets
Now comes the rewarding part. Choose your white paint and start applying. Use the same technique as the primer — foam roller for flat areas, angled brush for details.
Apply the first coat thinly. It’s tempting to go heavy, but thick coats take longer to dry and are more likely to drip or sag. A thin, even coat dries faster and looks better.
Let the first coat dry fully — usually 2-4 hours depending on the paint. Then apply a second coat. Most white cabinet projects need two to three coats for full, even coverage. If your old cabinet color was very dark, you might need a third coat.
Pro tip: paint the inside of cabinet boxes and drawer fronts first. This lets you work freely without worrying about drips on visible surfaces.
Step 6: Let Everything Cure Completely
Drying and curing are not the same thing. Paint feels dry to the touch within hours, but it takes days or even weeks to fully cure and become durable. Most cabinet paints need 3-7 days to fully cure.
During this time, avoid putting heavy pressure on the surfaces or closing doors too firmly. Keep your kitchen well-ventilated to help the curing process along.
Step 7: Reassemble and Enjoy
Once the paint is fully cured, it’s time to put everything back together. Reattach doors, drawers, and hardware using your labeled bags and numbers. Take your time — getting the alignment right makes all the difference.
Stand back and admire your work. Your kitchen just got a complete makeover, and you didn’t have to sand a single thing.
Common Mistakes to Avoid
Even with a no-sand method, mistakes can happen. Here are the most common ones and how to avoid them:
Skipping the Cleaning Step
Grease and grime are the enemies of paint adhesion. If you rush through cleaning, your paint will peel within weeks. Always deep-clean your cabinets before applying any primer or paint.
Using the Wrong Primer
Not every primer works on slick cabinet surfaces. Regular latex primer will bubble and peel on glossy finishes. Always use a bondable or adhesion-promoting primer designed for difficult surfaces.
Applying Too Thick a Coat
Thick coats cause drips, uneven texture, and longer drying times. Thin, even coats build up a better finish over multiple applications.
Not Letting Paint Dry Between Coats
Applying the next coat too soon traps moisture underneath. This leads to cracking, peeling, and a rough finish. Always follow the recommended drying times on the paint can.
Forgetting to Paint the Inside
It’s easy to focus on the front of cabinet doors and forget the sides, tops, and insides. Paint all surfaces evenly to prevent moisture from getting in and causing damage later.
Quick Tips for a Professional Finish
- Use a foam roller for flat surfaces. Foam rollers leave fewer marks than traditional rollers and work great on cabinets.
- Paint in a dust-free room. Close windows and turn off ceiling fans while painting and drying.
- Invest in good lighting. Proper lighting helps you spot drips, uneven coverage, and missed spots.
- Remove cabinet shelves. Paint shelves separately for a smoother, more even finish.
- Use a paint conditioner. Products like Floetrol improve flow and reduce brush marks on your final coat.
How Long Does the Project Take?
The timeline depends on the size of your kitchen and how many cabinets you have. On average, here’s what to expect:
- Day 1: Remove hardware, clean cabinets, and apply deglosser
- Day 2: Apply primer (two coats with drying time in between)
- Day 3: Apply first coat of paint
- Day 4: Apply second coat of paint
- Days 5-7: Let paint cure fully
- Day 7-8: Reassemble cabinets and enjoy the transformation
A typical kitchen with 15-25 cabinets can be completed in about one week. Larger kitchens may take a bit longer, but the process is much faster than traditional sanding methods.
Comparing Methods: Sanding vs. No-Sand Cabinet Painting
| Factor | Traditional Sanding Method | No-Sand Method |
|---|---|---|
| Time Required | 2-3 weeks | 5-8 days |
| Effort Level | Very high | Moderate |
| Mess Level | High (dust everywhere) | Low |
| Equipment Needed | Sander, sandpaper, masks, vacuums | Rags, deglosser, rollers, brushes |
| Risk of Damage | Higher — can remove too much material | Lower — preserves original finish |
| Final Durability | Excellent | Excellent (with proper primer) |
| Best For | Very rough or damaged surfaces | Most cabinet surfaces in good condition |
As you can see, the no-sand method wins on nearly every front for most kitchen cabinet projects. The only situation where traditional sanding might be better is if your cabinets have deep damage or flaking paint that needs to be physically removed. In those cases, a light sand might still be necessary.
Expert Insights on Cabinet Painting Without Sanding
Professional painters and cabinet refinishing experts agree: preparation is everything. The no-sand method works because it replaces mechanical abrasion (sanding) with chemical preparation (deglosser) and advanced adhesion technology (bondable primer).
“The key is choosing a high-quality bondable primer and not skipping the cleaning step,” says one cabinet painting specialist. “If you do those two things right, you’ll get results that last just as long as traditional methods.”
Another expert adds that water-based cabinet paints have improved dramatically in recent years. They self-level better, emit fewer fumes, and clean up with just soap and water. If you’re sensitive to odors, water-based options are the way to go.
One more tip from the pros: don’t paint in humid conditions. Moisture in the air slows drying and can affect adhesion. The best time for a cabinet painting project is during a dry season or when your kitchen has good ventilation.
Cost Breakdown: How Much Does It Really Cost?
One of the biggest advantages of painting cabinets yourself is the cost savings. Here’s a rough breakdown for a standard kitchen:
- Liquid deglosser: $10-$15
- Bondable primer (1-2 quarts): $30-$50
- Cabinet enamel paint (2-3 quarts): $40-$80
- Foam rollers, brushes, supplies: $15-$25
- New hardware (optional): $20-$60
Total cost for a DIY no-sand cabinet painting project typically ranges from $115 to $230. Compare that to the $5,000-$15,000 cost of a professional cabinet refacing or replacement. The savings are enormous, and the satisfaction of doing it yourself is priceless.
How to Maintain Your Newly Painted Cabinets
Your freshly painted cabinets deserve some care to keep them looking great for years. Here’s how to maintain them:
- Clean with a soft, damp cloth. Avoid abrasive sponges or harsh chemicals.
- Wipe up spills quickly. Water left sitting on the surface can damage the finish over time.
- Use gentle cleaners only. Mild dish soap and water work perfectly for routine cleaning.
- Avoid placing hot items directly on shelves. Use trivets or hot pads to protect the paint.
- Touch up chips promptly. Keep a small amount of leftover paint for quick repairs.
With proper care, your no-sand painted cabinets can look beautiful for 5-10 years or more. The bondable primer and quality enamel create a tough, resilient surface that handles the demands of a busy kitchen.
Frequently Asked Questions
Can I paint kitchen cabinets white without sanding if they have a glossy finish?
Absolutely. Glossy finishes are actually the best candidates for the no-sand method because liquid deglosser works well on smooth, slick surfaces. The deglosser chemically dulls the gloss, giving the primer something to grab onto. Just make sure you clean the surface thoroughly before applying primer.
Do I need to remove all my cabinet doors to paint them?
Yes, removing doors and drawer fronts is highly recommended. It gives you access to all surfaces and prevents paint from getting on hinges and adjacent cabinets. Working on flat, horizontal surfaces also makes the painting process much easier and more controlled.
How long does the paint last on cabinets without sanding?
When done correctly with a bondable primer and quality enamel paint, the finish can last 5-10 years or more. The no-sand method produces results just as durable as traditional sanding, as long as you follow each preparation step carefully.
Can I use chalk paint on kitchen cabinets without sanding?
Yes, chalk paint adheres well to prepared surfaces without sanding. However, chalk paint is softer and more prone to marking than enamel paint. If you use chalk paint, always apply a clear wax or topcoat sealer for protection against kitchen wear and moisture.
What’s the best white paint color for kitchen cabinets?
Popular white shades for cabinets include pure white, off-white, creamy white, and bright white. Pure white offers a crisp, modern look, while creamy white gives a warmer, traditional feel. Always test your chosen color on a small, hidden area first to make sure you love it before committing to the full project.
Is it better to use a brush or a roller for painting cabinets?
Both have their place. A foam roller works best for large, flat surfaces like cabinet doors because it applies paint evenly and quickly. An angled synthetic brush is essential for edges, corners, and detailed areas where a roller can’t reach. Using both tools together gives you the smoothest, most professional-looking finish.
Final Thoughts
Learning how to paint kitchen cabinets white without sanding is one of the most rewarding DIY projects you can tackle. It transforms your kitchen, saves you money, and doesn’t require any special skills or expensive equipment. With the right products and a little patience, you can achieve results that look professionally done.
The secret is in the preparation. Clean thoroughly, use a quality bondable primer, and apply thin, even coats of paint. Skip the sanding, skip the stress, and enjoy a beautiful kitchen that reflects your personal style.
Your cabinets have been waiting for this makeover. Grab your supplies, roll up your sleeves, and get started today. You’ll be amazed at what a little paint and the right technique can do.