

Yes, installing a kitchen faucet is easier than most people think. With the right tools, a basic understanding of your sink setup, and a little patience, most homeowners can complete a kitchen faucet installation in under an hour. This guide breaks down every step so you can tackle the project with confidence.
Key Takeaways
- DIY-Friendly: Most faucet installations require no professional plumbing skills and can be done by beginners.
- Basic Tools Suffice: A basin wrench, plumber tape, and adjustable wrench are all you typically need.
- Time-Saving: The entire process usually takes 30 to 60 minutes.
- Know Your Faucet Type: Different faucet styles have slightly different installation steps.
- Safety First: Always shut off the water supply before starting any plumbing work.
- Maintenance Matters: Proper care after installation extends the life of your new faucet significantly.
📑 Table of Contents
- What to Expect When You Install a Kitchen Faucet
- Tools You Will Need for Faucet Installation
- Step-by-Step Guide to Installing a Kitchen Faucet
- Common Faucet Types and How They Differ
- When to Call a Professional Instead
- Tips for Maintaining Your New Faucet
- Quick Tips for a Smooth Installation
- Common Mistakes to Avoid During Faucet Installation
- Expert Insights on Kitchen Faucet Installation
- Final Thoughts on Installing Your Kitchen Faucet
What to Expect When You Install a Kitchen Faucet
So, you want to swap out your old faucet or install a shiny new one. Great news — this is one of the most rewarding home improvement projects you can do on your own. You do not need to be a licensed plumber to get the job done right.
The truth is, a kitchen faucet installation is much simpler than it looks. Most modern faucets come with clear instructions and universal parts. Whether you are replacing a leaky old fixture or upgrading to a sleek pull-down sprayer, the process follows a similar pattern every time.
People often overthink this project. They imagine complicated pipes and mysterious fittings. But the reality is far more straightforward. You will be surprised at how manageable it really is once you see the steps laid out clearly.
Before you grab your tools, take a moment to understand what you are working with. Look under your sink and identify the water supply lines, the mounting hardware, and the drain assembly. Familiarity with these parts makes everything smoother. Once you know what is down there, the rest is just following a logical sequence.
This guide covers everything from the tools you need to the step-by-step process. By the end, you will feel ready to handle the job yourself. And you will save money on professional labor while you are at it.
Tools You Will Need for Faucet Installation
Having the right tools before you start is half the battle. You do not want to be halfway through the job and realize you are missing something important. Here is what you will need to gather before you begin your plumbing project.
Essential Tools
- Adjustable wrench: This is your go-to tool for loosening and tightening nuts under the sink.
- Basin wrench: A specialized tool that reaches into tight spaces under the sink. It makes a huge difference.
- Plumber tape (Teflon tape): This seals thread connections and prevents leaks. It is cheap and essential.
- Screwdriver set: Both flathead and Phillips head screws are commonly used in faucet mounting.
- Pliers: Needle-nose pliers help grip small parts and washers in tight spots.
- Bucket and towels: You will have some water spillage, so be prepared.
Nice-to-Have Extras
- Flashlight: The space under your sink can be dark. A headlamp or flashlight helps you see clearly.
- Plumber putty: Useful for creating watertight seals around the base of the faucet.
- Utility knife: For cleaning old putty or debris from surfaces before you install the new faucet.
Gathering everything ahead of time keeps your momentum going. There is nothing worse than stopping mid-project to find a missing tool. Set them all out on a towel or tray before you start working.
Step-by-Step Guide to Installing a Kitchen Faucet
Now for the part you have been waiting for — the actual installation. Follow these steps carefully and you will have a new faucet running in no time. This process applies to most standard kitchen sink setups.
Step 1: Shut Off the Water Supply
This is the most important step and the one people skip at their own risk. Locate the shut-off valves under your sink. Turn both the hot and cold valves clockwise to close them. Once closed, open the faucet to release any remaining water pressure. Place your bucket underneath to catch the last drops.
Never skip this step. Trust me. Working with water still flowing leads to messes and potential damage. It takes five seconds to shut off the valves. Do not rush past it.
Step 2: Remove the Old Faucet
Now you can disconnect the water supply lines from the valves. Use your adjustable wrench to loosen the connections. Have your bucket ready — a small amount of water will drip out. Once the lines are disconnected, look for the mounting nuts that hold the faucet to the sink.
Use your basin wrench to reach up and loosen these nuts. They can be tight, especially on older installations. Work slowly and steadily. If a nut feels stuck, do not force it. A little penetrating oil can help loosen corroded fittings.
Once all the mounting hardware is loose, carefully lift the old faucet out of the sink. Set it aside. Clean the surface thoroughly with a mild cleaner to remove old plumber putty, grime, or residue.
Step 3: Prepare the Sink for the New Faucet
Check the sink surface around the mounting holes. Make sure it is clean and dry. If your new faucet came with a gasket or rubber seal, position it now. Some faucets require plumber putty to be rolled into a rope and pressed around the base. Apply the putty evenly and gently press the faucet into place from above.
Thread the supply lines through the mounting holes from underneath the sink. This is where having a helper can be handy. Another set of hands keeps things steady while you work from both sides.
Step 4: Secure the New Faucet
From underneath the sink, place the mounting washer and nut onto the faucet stem. Use your basin wrench to tighten the nut. Do not overtighten — snug and firm is enough. Excessive force can crack the sink or damage the faucet body.
Once the faucet is secure, connect the hot and cold supply lines to the corresponding valves. Hand-tighten first, then give each connection a quarter turn with your wrench. Apply plumber tape to the threads for a watertight seal.
Step 5: Turn On the Water and Test
Slowly open both shut-off valves. Let the water flow for a minute to flush out any debris. Then check every connection point for leaks. Look under the sink carefully. If you spot a drip, tighten that connection slightly or reapply plumber tape.
Run both the hot and cold handles. Check the sprayer if your faucet has one. Let it run for a few minutes to make sure everything is working smoothly. Wipe down the faucet and sink to admire your handiwork.
And just like that, your faucet installation is complete. Take a moment to appreciate what you accomplished. You just saved yourself the cost of a service call and gained a useful DIY plumbing skill.
Common Faucet Types and How They Differ
Not all faucets are the same, and knowing the type you have matters for installation. Different faucet designs have different internal mechanisms and mounting requirements. Here is a quick look at the most common types you will encounter.
Single-Handle Faucet
This is the most popular style in modern kitchens. One lever controls both water temperature and flow. Installation is straightforward because there are fewer parts to manage. Most single-handle faucets use either a cartridge or ball mechanism inside.
Two-Handle Faucet
The classic design with separate hot and cold handles. These are common in older homes and traditional kitchens. Installation is slightly more involved because you need to align two handles and two separate valves. The good news is that the basic process is the same as a single-handle faucet.
Pull-Down and Pull-Out Faucets
These modern faucets have a sprayer built into the spout. They offer extra convenience for washing dishes and filling pots. The installation process is similar to a standard faucet, but you will also need to connect the sprayer hose. Make sure the sink has enough depth to accommodate the sprayer mechanism.
Wall-Mounted Faucet
These faucets mount directly to the wall instead of the sink deck. They create a sleek, open look. Wall-mounted faucets require different plumbing considerations, including proper wall reinforcement and height positioning. If you are considering this style, measure carefully before purchasing.
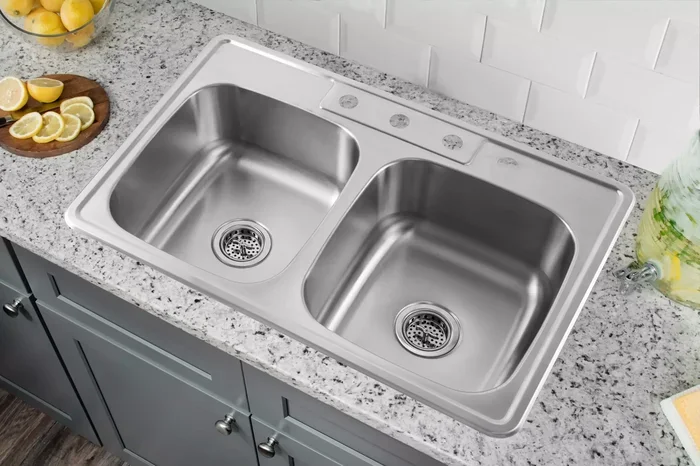
When shopping for a new faucet, check the hole configuration on your sink. Most kitchen sinks have either one, two, or three holes. Your new faucet must match this configuration. Buying a faucet with the wrong number of holes means extra drilling or an adapter, which adds complexity.
When to Call a Professional Instead
While most faucet installations are simple, there are situations where calling a professional makes sense. Understanding these scenarios saves you time, frustration, and potential damage to your home.
If your sink has unusual plumbing, such as a garbage disposal that complicates access, you might want expert help. Similarly, if the shut-off valves are corroded or stuck, forcing them can cause bigger problems. A licensed plumber has the experience to handle these tricky situations safely.
Another reason to call a pro is if you discover significant pipe damage during the removal process. Old pipes can be brittle, and removing a faucet sometimes reveals deeper issues. A professional can assess and address these problems without making things worse.
Also, consider your comfort level. There is no shame in hiring a plumber. If you feel uncertain at any point during the process, it is perfectly fine to step back and call for help. A professional installation typically costs between $100 and $300 for labor, which is a reasonable price for peace of mind.
And speaking of kitchen upgrades, once your new faucet is installed, you might want to explore some other ways to make your kitchen more functional. Check out this easy balanced breakfast guide for ideas on making the most of your kitchen space. Or if you love cooking with fresh herbs, learn how to make a quick and easy basil pesto to use your new faucet for washing fresh basil right away.
Tips for Maintaining Your New Faucet
Your new faucet is a significant investment, and proper maintenance keeps it looking and working great for years. A few simple habits go a long way in preventing buildup, leaks, and wear.
Clean Regularly
Wipe down your faucet after each use to prevent water spots and mineral buildup. Use a soft cloth and a mild cleaner. Avoid abrasive scrubbers that can scratch the finish. For stubborn deposits, soak a cloth in white vinegar and wrap it around the spout for 15 minutes.
Check for Leaks Periodically
Even a well-installed faucet can develop small leaks over time. Inspect the base and handles every few months. A tiny drip might seem harmless, but it wastes water and can damage the sink cabinet over time. Tighten connections or replace worn washers as needed.
Handle with Care
Do not overtighten the handles when turning off the faucet. Excessive force wears down internal components and shortens the lifespan. A gentle turn is all that is needed. If your faucet becomes stiff or hard to operate, it may be time to replace the cartridge or internal parts.
Address Hard Water Issues
If you live in an area with hard water, consider installing a water filter or softener. Hard water deposits build up quickly on metal surfaces and can reduce water flow over time. A simple filter on your supply lines can extend the life of your faucet and keep water tasting fresh.
With these maintenance habits, your new faucet will stay in excellent condition for many years. A little care goes a long way toward protecting your investment.
Quick Tips for a Smooth Installation
- Take photos before removing the old faucet. This gives you a reference for how everything is connected.
- Keep the manual handy. Every faucet brand has slightly different instructions. Refer to it if you get stuck.
- Work on a dry surface. Lay down a towel or mat under the sink to keep parts from rolling away and to catch drips.
- Do not overtighten. Snug is enough. Overtightening is the most common mistake beginners make.
- Test before finishing. Run water and check for leaks before you put everything back in place.
- Have a helper. A second person makes holding parts in place much easier, especially in tight spaces.
Common Mistakes to Avoid During Faucet Installation
Even simple projects have pitfalls. Being aware of common mistakes helps you avoid them and finish the job with confidence.
- Skipping the plumber tape: This small step prevents most leaks at threaded connections. Do not skip it.
- Forcing stuck parts: If a nut or fitting will not budge, apply penetrating oil and wait. Forcing it can break fittings or damage the sink.
- Mismatching faucet and sink holes: Always double-check the hole count before purchasing a new faucet.
- Forgetting to shut off the water: This leads to flooding and water damage. Always verify the valves are closed before disconnecting anything.
- Not reading the instructions: Every faucet has unique features. The manufacturer’s guide contains important details specific to your model.
Avoiding these mistakes keeps your installation smooth and leak-free. A little preparation prevents most common problems.
Expert Insights on Kitchen Faucet Installation
Professional plumbers agree that most homeowners can handle a standard faucet replacement without calling for help. The key is preparation and patience. According to industry experts, the most successful DIY installations happen when the homeowner takes time to understand their specific sink setup before purchasing a new faucet.
Experts also emphasize the importance of quality parts. A slightly more expensive faucet with solid brass construction and ceramic valves will last significantly longer than a budget plastic option. When you invest in a good faucet, you invest in fewer repair calls and better performance over time.
Another expert tip is to keep a small emergency plumbing kit under your sink at all times. Include plumber tape, an extra washer, and a mini flashlight. These items make handling minor issues quick and easy without a special trip to the hardware store.
If you are interested in expanding your kitchen cooking setup after this project, you might enjoy learning how to make easy garlic chilli pasta using fresh ingredients from your upgraded kitchen. And for a quick kitchen treat, try this recipe for easy healthy pancakes — perfect for a weekend morning after a satisfying DIY project.
Final Thoughts on Installing Your Kitchen Faucet
Installing a kitchen faucet is one of those projects that seems intimidating at first but turns out to be surprisingly manageable. With the right tools, clear instructions, and a bit of patience, you can complete the job in under an hour. The satisfaction of doing it yourself is hard to beat.
Remember to take your time, follow each step carefully, and never skip safety precautions. Shut off the water, work methodically, and test everything before you finish. If anything feels uncertain, there is no shame in calling a professional plumber for assistance.
Once your new faucet is in place, you will enjoy better functionality, improved aesthetics, and the pride of a job well done. A fresh faucet transforms your kitchen sink area and makes daily tasks more pleasant. It is a small upgrade with a big impact.
So go ahead, gather your tools, and give it a try. You might be surprised at how capable you are. And once you are done, you can celebrate with a delicious meal prepared in your newly upgraded kitchen. Happy installing!
Frequently Asked Questions
Can a beginner install a kitchen faucet?
Absolutely. Most kitchen faucet installations are designed to be beginner-friendly. You only need basic tools and about an hour of time. Follow the manufacturer’s instructions carefully, and you will do just fine.
How long does it take to install a kitchen faucet?
A typical faucet installation takes between 30 and 60 minutes. The exact time depends on your experience level, the faucet type, and the condition of your existing plumbing. First-timers might take a little longer, and that is completely normal.
Do I need any special plumbing skills to install a kitchen faucet?
No special plumbing skills are required. The process involves basic connections like attaching supply lines and tightening mounting nuts. If you can use a wrench and follow step-by-step instructions, you have all the skills you need.
What should I do if my new faucet leaks after installation?
A small leak usually means a connection is not tight enough or plumber tape was not applied correctly. Turn off the water, disassemble the leaking connection, reapply plumber tape, and reconnect. If the leak persists, check for damaged washers or O-rings that may need replacement.
Can I install a kitchen faucet without a basin wrench?
You can try, but a basin wrench makes the job significantly easier. It reaches into tight spaces under the sink that regular wrenches cannot access. They are inexpensive and widely available at hardware stores. It is a worthwhile investment for any home toolkit.
Is it better to hire a plumber or install the faucet myself?
For most standard installations, doing it yourself saves money and builds a useful skill. However, if your plumbing is old, corroded, or unusual, hiring a professional is the safer choice. A plumber typically charges $100 to $300 for the job, which covers both parts and labor in many cases.
=== CONCLUSION ===
Installing a kitchen faucet is easier than you think, and it is one of the most satisfying DIY projects you can tackle. With basic tools, clear instructions, and a little confidence, you can complete the job quickly and save money on professional installation costs. The steps are straightforward, the tools are affordable, and the results are immediate and visible.
Take your time, follow the guide, and enjoy the process. Whether you are replacing a leaky old fixture or upgrading to a modern pull-down sprayer, your new faucet will make your kitchen more functional and attractive. And once you have the satisfaction of a job well done, you will feel empowered to take on more home projects in the future.